【Linux】 Webサーバ構築
Linuxについての記事です。
CentOSを使ってWebサーバの構築ではApacheをインストールして使います。クライアントからのhttpプロトコルに応答するようになり、Webページの閲覧ができるようになります。
![]()
環境
•CentOS 6.5 64bit
•SELINUXの無効
yumコマンドを使ってパッケージインストールしていきます。
最初にyumパッケージのバージョン確認
# yum info httpd
Loaded plugins: fastestmirror, security
Determining fastest mirrors
 * base: www.ftp.ne.jp
 * extras: www.ftp.ne.jp
 * updates: www.ftp.ne.jp
base                                                                   | 3.7 kB     00:00
extras                                                                 | 3.4 kB     00:00
updates                                                                | 3.4 kB     00:00
updates/primary_db                                                     | 2.1 MB     00:00
Installed Packages
Name        : httpd
Arch        : x86_64
Version     : 2.2.15
Release     : 29.el6.centos
Size        : 2.9 M
Repo        : installed
From repo   : base
Summary     : Apache HTTP Server
URL         : http://httpd.apache.org/
License     : ASL 2.0
Description : The Apache HTTP Server is a powerful, efficient, and extensible
            : web server.
インストール
# yum -y install httpd
Loaded plugins: fastestmirror
Loading mirror speeds from cached hostfile
 * base: ftp.iij.ad.jp
 * extras: ftp.iij.ad.jp
 * updates: ftp.iij.ad.jp
Setting up Install Process
Resolving Dependencies
--> Running transaction check
---> Package httpd.x86_64 0:2.2.15-28.el6.centos will be installed
--> Processing Dependency: httpd-tools = 2.2.15-28.el6.centos for package: httpd-2.2.15-28.el6.centos.x86_64
--> Processing Dependency: apr-util-ldap for package: httpd-2.2.15-28.el6.centos.x86_64
--> Processing Dependency: /etc/mime.types for package: httpd-2.2.15-28.el6.centos.x86_64
--> Processing Dependency: libaprutil-1.so.0()(64bit) for package: httpd-2.2.15-28.el6.centos.x86_64
--> Processing Dependency: libapr-1.so.0()(64bit) for package: httpd-2.2.15-28.el6.centos.x86_64
--> Running transaction check
---> Package apr.x86_64 0:1.3.9-5.el6_2 will be installed
---> Package apr-util.x86_64 0:1.3.9-3.el6_0.1 will be installed
---> Package apr-util-ldap.x86_64 0:1.3.9-3.el6_0.1 will be installed
---> Package httpd-tools.x86_64 0:2.2.15-28.el6.centos will be installed
---> Package mailcap.noarch 0:2.1.31-2.el6 will be installed
--> Finished Dependency Resolution

Dependencies Resolved

================================================================================
 Package            Arch        Version                      Repository    Size
================================================================================
Installing:
 httpd              x86_64      2.2.15-28.el6.centos         updates      821 k
Installing for dependencies:
 apr                x86_64      1.3.9-5.el6_2                base         123 k
 apr-util           x86_64      1.3.9-3.el6_0.1              base          87 k
 apr-util-ldap      x86_64      1.3.9-3.el6_0.1              base          15 k
 httpd-tools        x86_64      2.2.15-28.el6.centos         updates       73 k
 mailcap            noarch      2.1.31-2.el6                 base          27 k

Transaction Summary
================================================================================
Install       6 Package(s)

Total download size: 1.1 M
Installed size: 3.6 M
Is this ok [y/N]: y
Downloading Packages:
(1/6): apr-1.3.9-5.el6_2.x86_64.rpm                      | 123 kB     00:00
(2/6): apr-util-1.3.9-3.el6_0.1.x86_64.rpm               |  87 kB     00:00
(3/6): apr-util-ldap-1.3.9-3.el6_0.1.x86_64.rpm          |  15 kB     00:00
(4/6): httpd-2.2.15-28.el6.centos.x86_64.rpm             | 821 kB     00:00
(5/6): httpd-tools-2.2.15-28.el6.centos.x86_64.rpm       |  73 kB     00:00
(6/6): mailcap-2.1.31-2.el6.noarch.rpm                   |  27 kB     00:00
--------------------------------------------------------------------------------
Total                                           467 kB/s | 1.1 MB     00:02
Running rpm_check_debug
Running Transaction Test
Transaction Test Succeeded
Running Transaction
  Installing : apr-1.3.9-5.el6_2.x86_64                                     1/6
  Installing : apr-util-1.3.9-3.el6_0.1.x86_64                              2/6
  Installing : httpd-tools-2.2.15-28.el6.centos.x86_64                      3/6
  Installing : apr-util-ldap-1.3.9-3.el6_0.1.x86_64                         4/6
  Installing : mailcap-2.1.31-2.el6.noarch                                  5/6
  Installing : httpd-2.2.15-28.el6.centos.x86_64                            6/6
  Verifying  : httpd-tools-2.2.15-28.el6.centos.x86_64                      1/6
  Verifying  : apr-util-ldap-1.3.9-3.el6_0.1.x86_64                         2/6
  Verifying  : apr-1.3.9-5.el6_2.x86_64                                     3/6
  Verifying  : httpd-2.2.15-28.el6.centos.x86_64                            4/6
  Verifying  : mailcap-2.1.31-2.el6.noarch                                  5/6
  Verifying  : apr-util-1.3.9-3.el6_0.1.x86_64                              6/6

Installed:
  httpd.x86_64 0:2.2.15-28.el6.centos

Dependency Installed:
  apr.x86_64 0:1.3.9-5.el6_2
  apr-util.x86_64 0:1.3.9-3.el6_0.1
  apr-util-ldap.x86_64 0:1.3.9-3.el6_0.1
  httpd-tools.x86_64 0:2.2.15-28.el6.centos
  mailcap.noarch 0:2.1.31-2.el6

Complete!
Webサーバの起動
# service httpd start
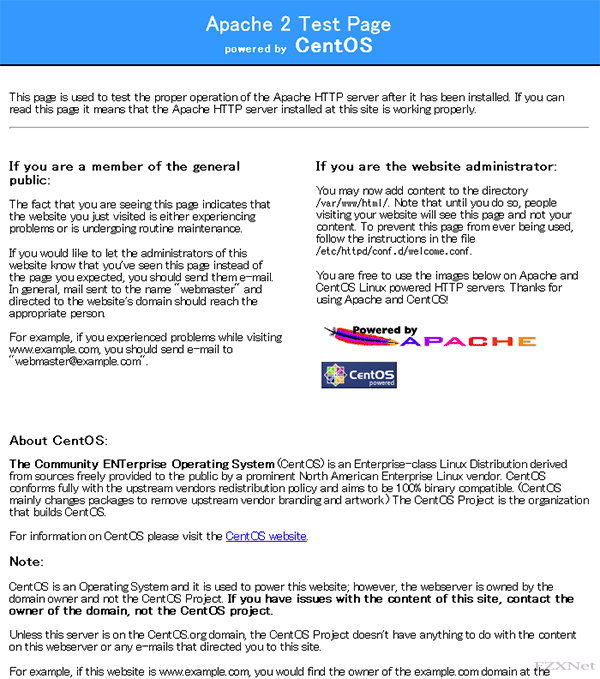
Webブラウザからホストマシンに接続できるか確認。
アドレス入力バーにhttp://ホストマシンのIPアドレスを入力してエンターキーを押します。
ファイアーウォール関連が接続をブロックしてしまっている可能性があるのでiptableサービス機能を止めます。
iptableサービスとはLinuxのファイアーウォール機能になります。
# service iptables stop
iptables: ファイアウォールルールを消去中:                  [  OK  ]
iptables: チェインをポリシー ACCEPT へ設定中filter         [  OK  ]
iptables: モジュールを取り外し中:                          [  OK  ]
これでファイアーウォール機能を無効にできました。
再度Webブラウザからホストマシンに接続をして確認します。
アドレス入力バーに「http://ホストマシンのIPアドレスまたはホスト名」を入力してエンターキーを押します。
ファイアーウォールが停止している状態ですのでファイアーウォールを再度起動します。そしてファイアーウォールの設定でhttpプロトコルをブロックしないように設定する必要があります。ファイアーウォールの設定を行うようにします。そうしないとファイアーウォールを有効にした状態でWebサーバが応答しない状態になったままです。
ファイアーウォール起動
# service iptables start
iptables: ファイアウォールルールを適用中:                  [  OK  ]
ファイアーウォールの設定
ここではWebサーバが80番ポートを使って応答するようになっていますので80番ポートの通信を通すように設定します。
# vi /etc/sysconfig/iptables

# Firewall configuration written by system-config-firewall
# Manual customization of this file is not recommended.
*filter
:INPUT ACCEPT [0:0]
:FORWARD ACCEPT [0:0]
:OUTPUT ACCEPT [0:0]
-A INPUT -m state --state ESTABLISHED,RELATED -j ACCEPT
-A INPUT -p icmp -j ACCEPT
-A INPUT -i lo -j ACCEPT
-A INPUT -m state --state NEW -m tcp -p tcp --dport 22 -j ACCEPT
-A INPUT -m state --state NEW -m tcp -p tcp --dport 80 -j ACCEPT
-A INPUT -j REJECT --reject-with icmp-host-prohibited
-A FORWARD -j REJECT --reject-with icmp-host-prohibited
COMMIT
iptableサービス機能を再起動します。
# service iptables restart
iptables: ファイアウォールルールを消去中:                  [  OK  ]
iptables: チェインをポリシー ACCEPT へ設定中filter         [  OK  ]
iptables: モジュールを取り外し中:                          [  OK  ]
iptables: ファイアウォールルールを適用中:                  [  OK  ]
ローカル環境で検証する環境構築ならファイアーウォール自体を無効にするのも選択の一つです。
ファイアーウォールを無効にして自動起動を無効。
# service iptables stop

# chkconfig iptables off

# chkconfig --list | grep iptables
iptables        0:off   1:off   2:off   3:off   4:off   5:off   6:off


