Linux サーバのアクセス制限設定
Linuxについての記事です。
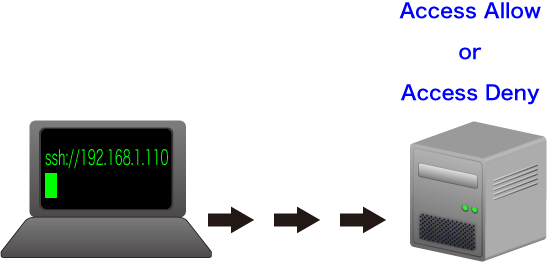
サーバ構築でCentOSをインストールした直後に行う設定がリモート接続のアクセス拒否設定です。
LinuxOSのCentOSでサーバとして運用させるときに、クライアントPCからリモートでホスト側のサーバに接続して操作することが多くなります。
CentOSのインストールをしたばかりの状態だと、どのクライアントマシンからでもリモート接続できるようになってしまっています。サーバマシンのセキュリティの状態をよくするために、指定したIPアドレスからのみリモートでの接続の要求を許可するように設定します。
この設定をしておけば、sshなどのリモート接続できるコンピュータを制限することができます。
自分の場合はデーモンごとに分けたりはしていませんが、デーモン毎にアクセス許可もしくはアクセス拒否をするホスト名やIPアドレスを指定することもできます。
/etc/hosts.allowと/etc/hosts.denyの編集
設定方法
テキストエディタを使って/etc/hosts.allowファイルと/etc/hosts.denyファイルを編集していきます。
書式はどちらのファイルも同じになります。
/etc/hosts.denyは接続を拒否するIPアドレスを指定します。
書式は
デーモン名:ホスト名もしくはIPアドレス
という具合になります。
すべてのデーモンのすべてのホスト名、IPアドレスからのアクセスを拒否もしくは許可するという具合に設定をするときの書式は
ALL: ALL
という入力をします。
アクセス拒否の設定
$ su -
パスワード:
# vi /etc/hosts.deny

#
# hosts.deny    This file contains access rules which are used to
#               deny connections to network services that either use
#               the tcp_wrappers library or that have been
#               started through a tcp_wrappers-enabled xinetd.
#
#               The rules in this file can also be set up in
#               /etc/hosts.allow with a 'deny' option instead.
#
#               See 'man 5 hosts_options' and 'man 5 hosts_access'
#               for information on rule syntax.
#               See 'man tcpd' for information on tcp_wrappers
#
ファイルを開くとこのような内容で表示されています。
ここの一番最後の行に接続拒否したいホスト名もしくはIPアドレスを入力していきます。
自分の場合はすべての接続を拒否したいのでALL:ALLを付け加えていきます。
この操作をするとすべてのクライアントからのリモート接続を拒否することができます。
この状態ではリモート接続できないので、/etc/hosts.allowファイルを設定してアクセス許可できるクライアントマシンを追加していきます。
# vi /etc/hosts.deny

#
# hosts.deny    This file contains access rules which are used to
#               deny connections to network services that either use
#               the tcp_wrappers library or that have been
#               started through a tcp_wrappers-enabled xinetd.
#
#               The rules in this file can also be set up in
#               /etc/hosts.allow with a 'deny' option instead.
#
#               See 'man 5 hosts_options' and 'man 5 hosts_access'
#               for information on rule syntax.
#               See 'man tcpd' for information on tcp_wrappers
#
ALL:    ALL
アクセス許可の設定
この状態でファイルを保存して次に/etc/hosts.allowファイルを編集します。
# vi /etc/hosts.allow

#
# hosts.deny    This file contains access rules which are used to
#               deny connections to network services that either use
#               the tcp_wrappers library or that have been
#               started through a tcp_wrappers-enabled xinetd.
#
#               The rules in this file can also be set up in
#               /etc/hosts.allow with a 'deny' option instead.
#
#               See 'man 5 hosts_options' and 'man 5 hosts_access'
#               for information on rule syntax.
#               See 'man tcpd' for information on tcp_wrappers
#
このファイルの一番下の行にアクセス許可するデーモンとそれに対応するホスト名もしくはIPアドレスを入力します。
自分の場合はすべてのデーモンに対して指定したIPアドレスからのみ接続許可していきます。
ALL: 10.10.1.0/255.255.255.0
ALL: 10.10.10.0/255.255.255.0
このようにIPアドレスとサブネットマスクを設定しておくことで接続許可するIPアドレスのクライアントを調節することができます。
指定されたセグメントからの通信のみ応答するようになり、それ以外は応答しません。
# vi /etc/hosts.allow

#
# hosts.deny    This file contains access rules which are used to
#               deny connections to network services that either use
#               the tcp_wrappers library or that have been
#               started through a tcp_wrappers-enabled xinetd.
#
#               The rules in this file can also be set up in
#               /etc/hosts.allow with a 'deny' option instead.
#
#               See 'man 5 hosts_options' and 'man 5 hosts_access'
#               for information on rule syntax.
#               See 'man tcpd' for information on tcp_wrappers
#
ALL: 10.10.1.0/255.255.255.0
ALL: 10.10.10.0/255.255.255.0
以上で接続許可、拒否の設定が完了です。システムを再起動します。
# shutdown -r now
システムの再起動後は設定が反映されます。

![Linuxエンジニア養成読本 [仕事で使うための必須知識&ノウハウ満載!] (Software Design plus)](http://ecx.images-amazon.com/images/I/514HvFEtsIL._SL160_.jpg)
![[24時間365日] サーバ/インフラを支える技術 ‾スケーラビリティ、ハイパフォーマンス、省力運用 (WEB+DB PRESS plusシリーズ)](http://ecx.images-amazon.com/images/I/51uK4ACymiL._SL160_.jpg)
![サーバ/インフラエンジニア養成読本 管理/監視編 [24時間365日稼働を支える知恵と知識が満載!] (Software Design plus)](http://ecx.images-amazon.com/images/I/51rxuWsg0uL._SL160_.jpg)


