Netatalkのインストール
Linuxについての記事です。
以前もLinuxOSにNetatalkをインストールしようとしましたがうまくできなくてもう一度リベンジしたいと思います。
目標地点はMac OS X 10.7 Lionにも対応できるAFPサーバの構築です。
以前はDebianにインストールを試みましたが今回挑戦するのはCentOS6.2 64bit版でのインストールです。
参考にさせていただいた先達のサイトです。Netatalk and Samba
1 Netatalkをインストールする前にライブラリ関連のインストール
Netatalkだけインストールをしても動作しないので他に読み込んでおくパッケージをインストールします。
ソースファイルからインストールする事もできそうですがパッケージが用意されていたのでそちらを利用させてもらいます。
Berkeley DB
OpenSSL
Libgcrypt
Avahi
OpenSLP
Libacl
OpenLDAP
これらのソフトが必要で以下のコマンドでインストールを実行
# yum install db4-devel openssl-devel libgcrypt-devel avahi-devel openslp-server openslp-devel libacl-devel openldap
2 Netatalkダウンロードとインストール
安定版の2.2.2のバージョンはソースファイルからのインストールになるのでファイルを公式サイトからダウンロードします。
公式サイトからファイルのダウンロード
# wget http://downloads.sourceforge.net/project/netatalk/netatalk/2.2.2/netatalk-2.2.2.tar.bz2 # tar jxf netatalk-2.2.2.tar.bz2 # cd netatalk-2.2.2 # ./configure --enable-redhat-sysv --enable-srvloc=yes--enable-zeroconf=yes --with-bdb=yes--with-ldap=yeschecking whether configuration files should be overwritten... no checking for LDAP (necessary for client-side ACL visibility)... yes checking ldap.h usability... no checking ldap.h presence... no checking for ldap.h... no configure: error: Missing LDAP headers [root@centos netatalk-2.2.2]# make make: *** ターゲットが指定されておらず, makefile も見つかりません. 中止.
makeが通らないので調べる。
ライブラリ関連で足りなかったopenldap-develをインストール
# yum install openldap-devel
netatalkのconfigureスクリプトを実行
ソースコードのビルドをしてインストール
5/19追記
configureをする前にhelpを参照してライブラリ関連の読み込みや、オプションを確認する
※ configureを実行するときにライブラリ関連がインストールされていれば自動的に読み込む事ができるようです。Berkeley DBをソースファイルからインストールした場合はファイルパスを入力してconfigureをします。HATさんありがとうございました。
# ./configure --enable-redhat-sysv --enable-srvloc# ./configure --help `configure' configures this package to adapt to many kinds of systems. Usage: ./configure [OPTION]... [VAR=VALUE]... To assign environment variables (e.g., CC, CFLAGS...), specify them as VAR=VALUE. See below for descriptions of some of the useful variables. Defaults for the options are specified in brackets. # ./configure --enable-redhat-sysv Configure summary: Install style: redhat-sysv AFP: Large file support (>2GB) for AFP3: yes Extended Attributes: ad | sys CNID: backends: dbd last tdb UAMS: DHX ( SHADOW) DHX2 ( SHADOW) RANDNUM (afppasswd) clrtxt ( SHADOW) guest Options: DDP (AppleTalk) support: no SLP support: yes Zeroconf support: yes tcp wrapper support: no quota support: no admin group support: yes valid shell check: yes cracklib support: no dropbox kludge: no force volume uid/gid: no ACL support: yes LDAP support: yes # make # make install=yes--enable-zeroconf=yes--with-bdb=yes--with-ldap=yes
ここまでの操作でインストールができたように思う。

3 Netatalkの設定ファイルの場所の確認
設定ファイルは/usr/local/etc/netatalk以下にあるようです。
AFPのバージョン確認
# afpd -V
afpd 2.2.2 - Apple Filing Protocol (AFP) daemon of Netatalk

This program is free software; you can redistribute it and/or modify it under
the terms of the GNU General Public License as published by the Free Software
Foundation; either version 2 of the License, or (at your option) any later
version. Please see the file COPYING for further information and details.

afpd has been compiled with support for these features:

          AFP versions:	2.2 3.0 3.1 3.2 3.3
DDP(AppleTalk) Support:	No
         CNID backends:	dbd last tdb
           SLP support:	Yes
      Zeroconf support:	Yes
  TCP wrappers support:	No
         Quota support:	No
   Admin group support:	Yes
    Valid shell checks:	Yes
      cracklib support:	No
        Dropbox kludge:	No
  Force volume uid/gid:	No
            EA support:	ad | sys
           ACL support:	Yes
          LDAP support:	Yes

             afpd.conf:	/usr/local/etc/netatalk/afpd.conf
   AppleVolumes.system:	/usr/local/etc/netatalk/AppleVolumes.system
  AppleVolumes.default:	/usr/local/etc/netatalk/AppleVolumes.default
    afp_signature.conf:	/usr/local/etc/netatalk/afp_signature.conf
      afp_voluuid.conf:	/usr/local/etc/netatalk/afp_voluuid.conf
         afp_ldap.conf:	/usr/local/etc/netatalk/afp_ldap.conf
       UAM search path:	/usr/local/etc/netatalk/uams/
  Server messages path:	/usr/local/etc/netatalk/msg/
              lockfile:	/var/lock/afpd
4 netatalk.confの設定
設定ファイルの変更を行う。 文字コード関連の設定をします。
場所 /usr/local/etc/netatalk/netatalk.conf
# gedit /usr/local/etc/netatalk/netatalk.conf

ATALK_UNIX_CHARSET='UTF8′
ATALK_MAC_CHARSET='MAC_JAPANESE'


5 afpd.confの設定
ファイル共有サービスの設定する
afpd.confの書式
場所 /usr/local/etc/netatalk/afpd.conf
# gedit /usr/local/etc/netatalk/afpd.conf

- -tcp -uamlist uams_dhx2.so,uams_dhx.so -maccodepage MAC_JAPANESE -setuplog "default LOG_NOTE /var/log/netatalk.log"
6 AppleVolumes.defaultの設定
afpd によって使われる設定ファイルで、 Appletalk を経由してファイルシステムのどの部分を共有するかを決定する。CentOSでマウントしているディスクドライブの中で共有させるディレクトリを指定する事ができ、ユーザごとにディレクトリを割り当てる事ができます。
パーミッション関連の設定をします。
場所 /usr/local/etc/netatalk/AppleVolumes.default
:DEFAULT: options:upriv,usedots dperm:0700 fperm:0600 maccharset:MAC_JAPANESE ea:sys
一番下の行に共有させるディレクトリを指定します。
例
/home/user/afpd/ :nobody 誰でも共有できるという意味。:userでそのユーザのみ共有可能
TimeMachineでディスクを認識させる為の設定を加えます。
例
/home/user/timemachine "usertimemachine" options: tm volsizelimit:1 userというユーザに700GBのドライブスペースをusertimemachineという名前で認識させるという意味
7 ブート時に起動する設定
# chkconfig netatalk on
# chkconfig avahi-daemon  on
8 ファイアーウォールの設定
ファイアーウォールのポートを開放
AFPは548番ポートを使用します。
場所 /etc/sysconfig/iptables
# gedit /etc/sysconfig/iptables

-A INPUT -m state --state NEW -m tcp -p tcp --dport 548  -j ACCEPT
-A INPUT -m state --state NEW -m udp -p udp --dport 548  -j ACCEPT

9 再起動
サービスの停止方法がわからなかったので再起動。
# reboot -h now
再起動後Macから認識できるかを確認
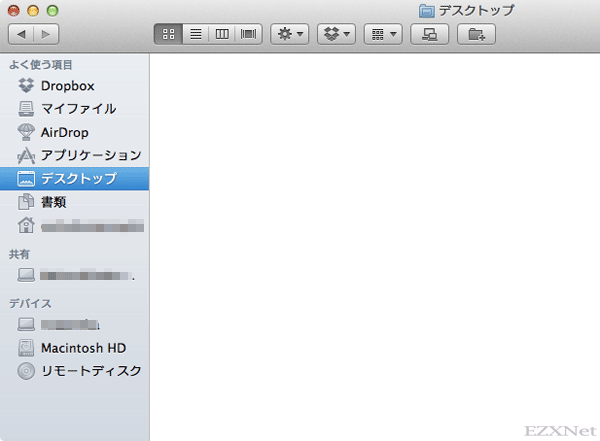
Mac OS X 10.7 LionのFinderでは表示されませんでした。
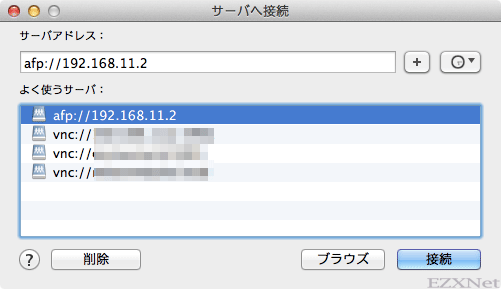
メニューバーの移動からサーバへ接続してafp://ホスト名.localを入力してもエラーになってしまう状態。
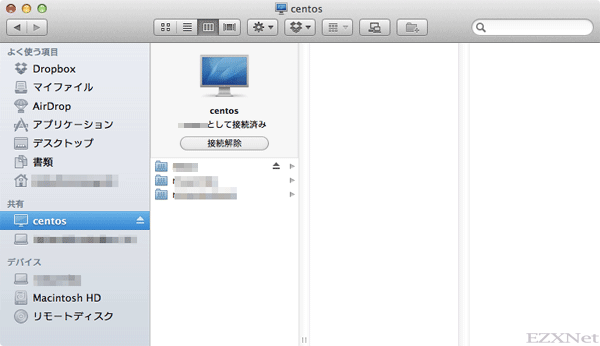
サーバのIPアドレスを入力して接続をするとFinderのサイドバーに表示されました。
この状態だとフォルダの作成も問題なくできました。


Mac OS X 10.6とMac OS X 10.5のFinderのサイドバーにも共有アイコンが表示されないため、afp://IPアドレスで接続できました。

ちなみにping ホスト名.localとしてもunknownでした。
コンピュータ同士の名前解決でうまく見つけられていない様子でしたが接続ができました。
ここからまた名前解決の部分も確認してみたいと思います。
[5/21追記]
以下はその後に設定を行った内容です。Berkeley DBを新しいのにしました。
# tar zxf db-5.3.15.gz
# cd db-5.3.15
# cd build_unix
# ../dist/configure --help
`configure' configures Berkeley DB 5.3.15 to adapt to many kinds of systems.

Usage: ../dist/configure [OPTION]... [VAR=VALUE]...

To assign environment variables (e.g., CC, CFLAGS...), specify them as
VAR=VALUE.  See below for descriptions of some of the useful variables.

Defaults for the options are specified in brackets.

# ../dist/configure --with-uniquename
# make
# make install

Installing documentation: /usr/local/BerkeleyDB.5.3/docs ...
# cd netatalk-2.2.2
# ./configure --help
# ./configure --enable-redhat-sysv --with-bdb=/usr/local/BerkeleyDB.5.3

Using libraries:
    LIBS = -lpthread  -L$(top_srcdir)/libatalk
    CFLAGS = -I$(top_srcdir)/include -D_U_="__attribute__((unused))" -g -O2 -I$(top_srcdir)/sys
    SSL:
        LIBS   =  -L/usr/lib64 -lcrypto
        CFLAGS =  -I/usr/include/openssl
    LIBGCRYPT:
        LIBS   = -lgcrypt -ldl -lgpg-error
        CFLAGS =
    BDB:
        LIBS   =  -L/usr/local/BerkeleyDB.5.3/lib -ldb-5.3
        CFLAGS =  -I/usr/local/BerkeleyDB.5.3/include/
Configure summary:
    Install style:
         redhat-sysv
    AFP:
         Large file support (>2GB) for AFP3: yes
         Extended Attributes: ad | sys
    CNID:
         backends:  dbd last tdb
    UAMS:
         DHX     ( SHADOW)
         DHX2    ( SHADOW)
         RANDNUM (afppasswd)
         clrtxt  ( SHADOW)
         guest
    Options:
         DDP (AppleTalk) support: no
         SLP support:             no
         Zeroconf support:        yes
         tcp wrapper support:     no
         quota support:           no
         admin group support:     yes
         valid shell check:       yes
         cracklib support:        no
         dropbox kludge:          no
         force volume uid/gid:    no
         ACL support:             yes
         LDAP support:            yes

# make
# make install
ファイアーウォールのポートを開放
mDNSで名前解決ができるようにそのポートを開放します。mDNSはAvahi-daemonがやってくれます。
Avahiが使用するは5353番ポートのプロトコルはUDPを使用します。
開放するポートを追記
場所 /etc/sysconfig/iptables
# gedit /etc/sysconfig/iptables

-A INPUT -m state --state NEW -m udp -p udp --dport 5353  -j ACCEPT
自分の環境ではAvahi-daemonの使用するポートを開放しないとサーバが見つけられなかったのですが、これでFinderの共有フォルダが常に表示されるようになってくれました。
AFPサーバのステータス確認
# asip-status.pl 192.168.11.2
AFP reply from 192.168.11.2:548
Flags: 1  Cmd: 3  ID: 57005
Reply: DSIGetStatus
Request ID: 57005
Machine type: Netatalk2.2.2
AFP versions: AFP2.2,AFPX03,AFP3.1,AFP3.2,AFP3.3
UAMs: DHCAST128,DHX2
Volume Icon & Mask: exist
Flags: SupportsCopyFile,SupportsServerMessages,SupportsServerSignature,SupportsTCP/IP,SupportsSrvrNotifications,SupportsOpenDirectory,SupportsUTF8Servername,SupportsUUIDs,SupportsSuperClient
Server name: centos
Signature:
0c 9a 7c 1e ea b0 9b 6e 08 23 ae 4a 30 2e 0c 13  ..|....n.#.J0...

Network address: 192.168.11.2 (TCP/IP address)
UTF8 Servername: centos


configureのオプションが間違っています。
./configure –helpで確認してください。
–enable-srvloc[=DIR] enable Server Location Protocol (SLP) support
–enable-zeroconf[=DIR] enable Zeroconf support [auto]
–with-bdb=PATH specify path to Berkeley DB installation[auto]
–with-ldap LDAP support (default=auto)
そもそもこれらは指定しなくても自動認識されます。
サーバが見えないのはavahiが動いてないか、avahiのポートが開いてないかでしょう。